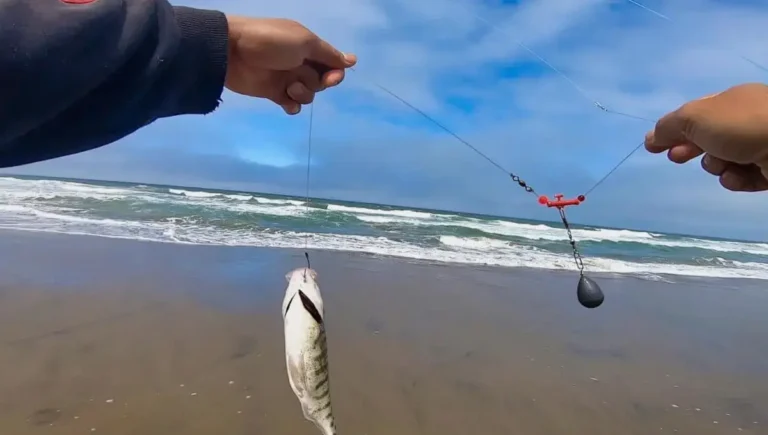
After extensive years of beach fishing, one rig has proven to be my favorite. Although it requires extra time initially, the payoff is significant, especially when dealing with toothy fish or navigating rocky terrain. A notable advantage is its adaptability – in the event of a break, only a small part needs retying, preserving crucial fishing time.
This efficient surf fishing rig not only addresses challenges in coastal environments but also streamlines the angling experience. Uncover the details below to learn how to tie this time-saving and effective rig, transforming your beach fishing ventures into more rewarding experiences.
Here are the steps to tie the surf fishing rig in a clear step-by-step format:
Materials Needed
30lb leader
20lb leader
Hooks
Steps:
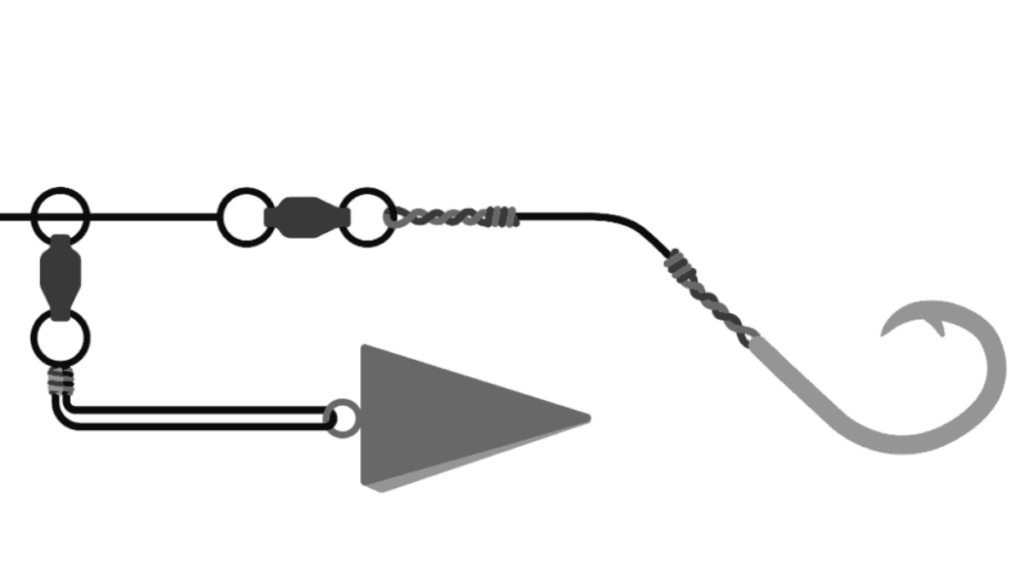
Tie a double overhand loop knot at the end of the 30lb leader. This will be the bottom of the core.
Tie the first dropper loop about 10″ above the bottom loop using the 30lb leader.
Tie the second dropper loop 15-20″ above the first loop using the 30lb leader.
Cut the 30lb leader 10-15″ above the second dropper loop. This is the top of the core.
Tie a perfection loop at the end of a piece of 20lb leader. This will be an offshoot.
Cut the 20lb leader to 7-8″ in length for the offshoot.
Use a loop-to-loop connection to attach the offshoot loop to one of the core loops.
Tie a hook to the end of the offshoot using an Orvis knot.
Repeat steps 5-8 to attach a second offshoot to the other core loop.
Tie an Orvis knot to attach a 10″ piece of 20lb leader to the bottom core loop.
Tie a large perfection loop at the end of this bottom offshoot.
Attach the top of the core to your main line using an FG knot.
How do you tie a saltwater rig?
To tie a saltwater rig, you can follow these steps:
Start by selecting the appropriate fishing line for your rig. Monofilament or fluorocarbon lines are commonly used in saltwater fishing due to their strength and durability.
Cut a section of line to the desired length for your leader. The length of the leader will depend on the fishing conditions and target species.
Tie a loop at one end of the leader line using a strong knot such as a Bimini Twist or a Spider Hitch. This loop will serve as the connection point for attaching the rig to your mainline.
Slide a swivel through the loop created in the previous step. The swivel will prevent line twists and allow for easy attachment of the rig to your mainline.
On the other end of the leader line, tie another strong knot such as a Palomar Knot or an Improved Clinch Knot. This knot will secure your hook, lure, or other terminal tackle to the rig.
Depending on the type of fishing you’ll be doing, you may also add additional components to your rig, such as beads, floats, or sinkers, to enhance its effectiveness.
Once your rig is complete, please attach it to your mainline by connecting the swivel to a sturdy snap or barrel swivel on the mainline. This connection allows for easy change-out of rigs and prevents line twists.
What is the best rig for surf fishing?
There are the best rig options that are commonly used and effective for surf fishing:
Carolina Rig: This is a very versatile rig that can be used for a variety of species. It consists of a weight slid up the line above a swivel or bead, with a long leader line coming off the swivel/bead tipped with a hook. The weight lets you cast further, and fish can swallow the bait without feeling the weight.
Fish Finder Rig: Similar to Carolina but without the swivel/bead. The weight slides directly on the main line above the hook/bait. Good for feeling subtle bites better than the Carolina rig.
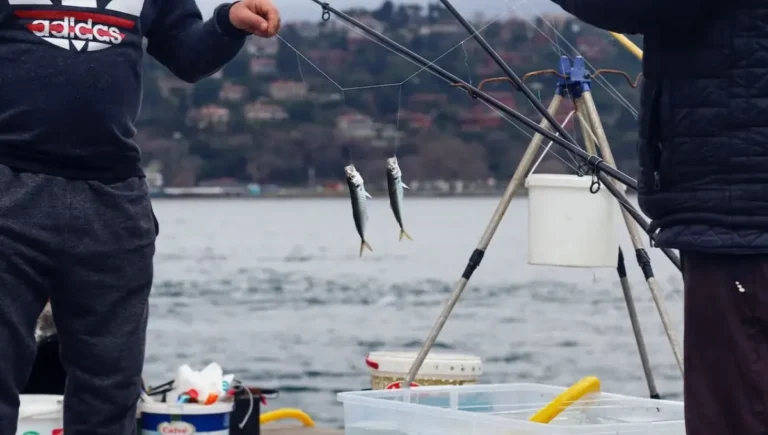
Dropper Loop Rig: Described above, with a mainline and droppers off it tipped with hooks. Allows multiple baits to be fished. Good for places with lots of snags.
High/Low Rig: Variation of dropper loop with two hooks – one high up short leader for swimming baits, one low on the longer leader for stationary baits.
Boat Rig: Weight runs down the main line with multiple hooks/baits directly tied/crimped on the line above the weight at intervals. Good for fishing from structures like piers/jetties with less risk of snags.
Beach Fishing Rigs For Beginners
For beginners in beach fishing, here are a few simple and effective rig setups to get you started:
Carolina Rig
Attach a leader line of about 2 to 4 feet to the other end of the swivel.
Tie a hook of appropriate size to the end of the leader.
Slide a bullet weight onto the mainline above the barrel swivel.
Optionally, you can add a bead between the weight and the swivel for extra protection.
This rig allows your bait to sit on the bottom while the weight keeps it in place, making it suitable for targeting species like surfperch, flounder, or redfish.
Fish Finder Rig
Attach a leader line of about 2 to 4 feet to the other end of the swivel.
Tie a hook of appropriate size to the end of the leader.
Slide a fish finder slide or a sinker slide onto the mainline.
Attach an appropriate weight, such as a pyramid sinker or a bank sinker, to the fish finder slide.
This rig allows your bait to move freely with the current while the weight keeps it anchored. It’s suitable for a variety of species, including larger fish like striped bass or snook.
High-Low Rig
Attach two leader lines of about 1 to 2 feet to the other two ends of the swivel.
Tie hooks of appropriate sizes to the ends of each leader.
Optionally, you can add a small weight or a sinker to the bottom leader to keep it grounded.
This rig allows you to fish with multiple baits at different depths, increasing your chances of catching fish like pompano, whiting, or bluefish.
How to Tie Bottom Fishing Rigs
Tying bottom fishing rigs is relatively straightforward. Here are three common and effective bottom fishing rig setups:
Basic Bottom Rig
Start by cutting the length of the leader line, typically around 2 to 4 feet, depending on the fishing conditions and target species.
Tie one end of the leader line to the mainline using a strong knot such as a Palomar Knot or an Improved Clinch Knot.
Slide a weight, such as a pyramid sinker or a bank sinker, onto the mainline.
Tie the other end of the leader line to a sturdy swivel using another strong knot.
Attach your hook of choice to the swivel using a suitable fishing knot.
This rig allows your bait to sit on the bottom while the weight keeps it in place, making it ideal for bottom-dwelling species like grouper, snapper, or flounder.
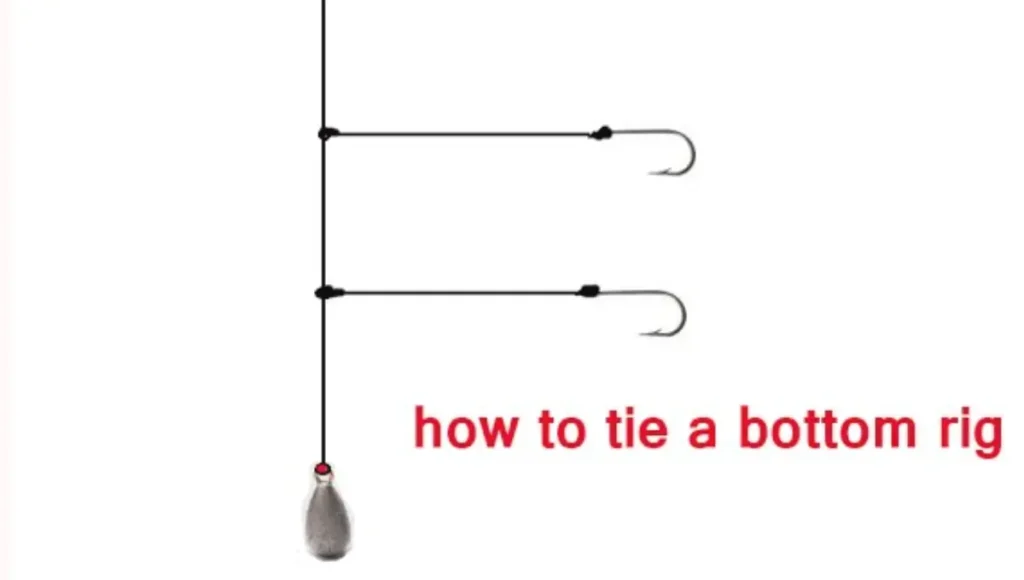
Dropper Loop Rig
Cut the length of the leader line, usually around 2 to 4 feet.
Tie a dropper loop in the middle of the leader line by forming a loop and twisting it several times.
Create a second loop by passing the tag end through the original loop.
Repeat the twisting process with the second loop, making sure both loops are of similar size.
Slide a weight, such as a bank sinker, onto the tag end of the leader line.
Attach your hook to the tag end of the leader using a suitable fishing knot.
This rig allows you to have multiple baited hooks at different depths, increasing your chances of catching fish like snapper, sea bass, or cod.
Paternoster Rig
Cut the length of the leader line, typically around 2 to 4 feet.
Tie a hook to one end of the leader line using a suitable fishing knot.
Tie a second hook to the leader line, leaving enough space between the two hooks.
Attach a weight, such as a ball sinker or a barrel sinker, to the bottom end of the leader line.
Tie the other end of the leader line to a sturdy swivel using a strong knot.
This rig allows you to fish with multiple hooks at different depths, making it effective for species like snapper, cod, or halibut.
Frequently Asked Questions
Time efficiency is vital as it allows more time for actual fishing, increasing the chances of a successful catch.
The rig’s unique design minimizes downtime – when broken off, only a small part needs retying, saving significant time on the water.
Choosing these specifications increases the likelihood of offshoots breaking off when snagged, preserving the core for longer use.
The 30 lb core provides strength, durability, and resilience, ensuring the rig can handle the challenges of surf fishing environments.
A: Members gain access to exclusive fishing spots, valuable tips, and discounts at the online tackle store, enhancing their overall fishing experience.
Conclusion
Mastering the art of tying the best surf fishing rigs is not just about optimizing your chances of a successful catch; it’s about maximizing your time on the water. The highlighted time-efficient fishing method, featuring a unique design and a 30 lb core with 20 lb offshoots, provides a distinct advantage in challenging environments.
Its quick retying process, especially when faced with toothy fish or rocky terrain, ensures a seamless fishing experience. This approach allows anglers to spend more time fishing and less time on rig maintenance.
The post also introduces the Insider Club, offering exclusive fishing spots, valuable tips, and discounts at the online tackle store, further enhancing the overall fishing experience. Adopt this efficient rigging method to transform each surf fishing outing into a rewarding and time-effective angling adventure.
Selecting the right size for your braided surf fishing line in 2024 is crucial for a successful and enjoyable fishing experience. The size of your fishing line plays a vital role in determining its strength, casting distance, and overall performance in different surf conditions. In this dynamic year, where advancements in fishing gear are always…
Embarking on the journey of surf fishing might feel like navigating unexplored waters, akin to my own experience when I delved into this pursuit a few years ago. Despite the similarities between saltwater and freshwater fishing, the subtle nuances and crucial distinctions become apparent, especially when it comes to the fishing tackle, including sinkers and…
Selecting the right weight for surf fishing is paramount, influenced by factors like wind, waves, and currents. With over 40 years of experience as a FISHING CHARTER CAPTAIN along Florida’s Treasure Coast, I recognize the weight’s critical role in diverse fishing scenarios. This guide delves into the significance of lead sinkers across various fishing styles,…
When employing the diamond jig fishing technique in the surf, the key is to cast the lure beyond the breaking waves, enticing predatory fish with the lifelike movements of a baitfish. The diamond jig, a versatile lure, effectively mimics the appearance and behavior of prey, making it particularly appealing to species like striped bass, bluefish,…
Whether you’re a beginning angler or a seasoned pro, there are a few essential knots that every fisherman should have in their arsenal. Proper knot tying is an important fishing skill that allows you to securely connect lines, hooks, swivels, and other tackles. However, with so many knots to choose from, it can be hard…
Choosing the right color for your braid line is a critical decision for surf fishing enthusiasts. The color of your line can make a significant impact on the success of your fishing expedition, affecting the depth at which your bait sinks and its visibility underwater. This choice can truly make or break your day on…


One Comment